Archive for the ‘Do-It-Yourself’ Category

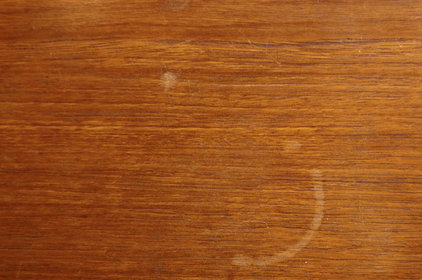
Quick Fix: Erase Water Rings from Furniture

Tuesday, June 18th, 2013

Despite how religious you are about coaster use in your house, chances are you have at least one water ring plaguing a piece of furniture. I didn’t learn the importance of coasters until after college, and by then my beautiful hand-me-down Drexel coffee table had been tarnished with multiple rings from bottles of beer and wine. Is it too late to save it? Luckily Peter Stames of Archia Homeshas a solution for even the toughest of alcohol and water stains.

To get rid of a new stain: Apply a clean cloth to blot the stain, and press a warm iron on top of the cloth until the stain is removed. Make sure the iron is just warm — not hot — and don’t use any steam. If you’d rather not use this technique, try rubbing the stain with a soft cloth and olive oil or another natural oil.

If this doesn’t work, try using mayonnaise or petroleum jelly and leave it overnight. Simply wipe it clean the next morning — the stain should be gone.

To get rid of an older stain: Moisten a cotton cloth in olive oil, and touch the cloth to a bit of rottenstone. Gently rub the stained area with the cloth until the ring appears to be gone. Never wax or polish over an alcohol or water ring, since this will permanently set the stain on the wood finish.

Rottenstone is a rock used as a polishing abrasive in woodworking, and is usually made with limestone mixed with other materials. This fine powder can be mixed with natural oils to polish wood to a fine finish.

To View & Search All MLS Listed Houses for Sale Visit Us At:

www.EdmontonHomesforSale.biz


Source: houzz.com

Magnificent Edmonton Makeovers on a Budget

Wednesday, June 12th, 2013

Have you ever watched those TV shows where some lucky homeowner gets a room redecorated by a professional? To have something similar done in your own home you would have to make a serious investment, or become a TV show guest!

However, there are ways to re-decorate a room and make it look great – even spectacular – on a budget.

Say, for example, you want a living room makeover. If your sofa is worn you can buy a fitted sofa cover that will make it look almost new. Table cloths on worn end-tables and other surfaces can have a similar affect.

Don’t forget the most economical redecorating trick of them all: Paint! A fresh coat of paint can bring a room to life!

Hanging a few new pictures can also have a dramatic impact on the look of a room. You don’t have to buy a Rembrandt. Attractive, simply framed pictures will also add interest and colour.

With a little imagination, it’s amazing how much you can improve a room on a little or even no budget.


To View & Search All MLS Listed Houses for Sale Visit Us At:

www.EdmontonHomesforSale.biz

Spring Patio Fix-Ups: 6 Ways to Light Your Outdoor Room

Thursday, May 30th, 2013

Enhance those long, leisurely evenings on the patio with the right lighting. From subtle landscape lighting and string lights that cast a soft glow to sconces, pendants and more, these ideas will help spark your imagination and plan that perfect patio.

1. String Lights

Nothing can beat the soft, glowing light of café-style lights strung overhead, and since they are so inexpensive, you can use them liberally without denting your budget.

Good to know: Be sure to choose outdoor-rated string lights. LED bulbs will last practically forever, but incandescent bulbs will give you that trademark soft glow. Solar string lights are a great option if you want to hang them far from an outlet.

A note on extra outlets. Having adequate exterior outlets is a must for hanging string lights, lanterns and more (unless they’re solar powered). Make the investment in exterior outlets instead of running cords through a cracked window — not only will your home be safer, but you’ll be able to choose exactly where you want the outlets to go.

Good to know: If you live in an older house, your exterior outlets might not have up-to-date safety features, so consider having them upgraded. All exterior electrical outlets should have a ground-fault circuit interrupter (GFCI) and a weatherproof box cover to keep the outlet protected.

2. Sconces

Sconces are a great option when you want to cast a glow on an open patio.

Good to know: A lantern-style fixture will cast a larger glow than one mounted flush against the house, so think about going for something larger than you might use on, say, the front porch.

3. Landscape Lighting

Not just for the backyard, low-voltage landscape lighting can ramp up the ambience of your patio.

Good to know: Generally not enough to light up an outdoor room on its own, landscape lighting can work well in conjunction with sconces or string lights. Try a few low lights in bushes surrounding the patio or illuminating a pathway.

Because landscape lighting is low voltage, this is a relatively easy and safe DIY project, should you choose to give it a whirl.

4. Pendant Lights

Few things say outdoor room quite as elegantly as a well-placed pendant light.

Good to know: If you decide to replace an existing overhead fixture yourself, be sure the new fixture is similar in weight to the old one — if it’s much heavier, a pro may need to put in a new junction box that can take the additional weight.

5. Recessed Lighting

Simple and sleek, recessed lights would be perfect tucked into the covered patio of a contemporary or modern home.

Good to know: Dimmer switches allow you to adjust the lighting to perfectly suit the mood — and a dimmer is something you can do yourself.

Extend dinnertime with a well-lit outdoor kitchen. If your grilling area is separate from your patio seating area, consider subtly linking the two zones with lighting. Direct lighting is more important in the kitchen zone than mood, so go for an overhead option, like recessed lights or adjustable fixtures that can be pointed exactly where you want them to go.
6. Stair Riser Lights

This small touch can add ambience and prevent falls.

Good to know: Having just one or two steps can actually cause more accidents than a taller staircase. Especially at dusk, that single step can be easy to miss, so adding a light is a kind thing to do.

Source: houzz.com

Purchase Plus Improvement

Tuesday, May 7th, 2013

You’ve found a house that you like but it needs improvements. The Purchase Plus Improvement program will allow you to add the renovation cost to the purchase price, so you can benefit from a low mortgage interest rate and make only one payment.
Before, you go and make an offer, there are a few conditions that will help determine whether this program suits your needs. One of the first misunderstandings with Purchase Plus Improvement, is that most people do not realize that they will have to pay for the renovations themselves, until the work is completed. The lender will mandate that the solicitor “hold back” the additional cost added to the mortgage, that represents the improvement amount. Once the work has been completed, an appraiser will have to supply the lender with an inspection report, to verify the work has been completed as agreed. The lender will instruct the solicitor to release the funds from his trust account, to pay for the improvements. My advice in these circumstances, is to take advantage of family, or lines of credit to finance these costs until completion. Some renovation companies my not require payment until work is complete.
Secondly, CMHC and Genworth both have guidelines regarding maximum improvement allowance. The improvements cannot exceed 10% of improved value or $40,000.
Thirdly, before I can submit this type of transaction to the lending institution, you will need to supply me with a quote and/or a renovation contract. For self-renovations provide cost of supplies from Home Depot/ Rona. Note, lender will not pay for borrower’s own labor.

Please ensure to keep all invoices and receipts. All invoices and receipt must also be provided to the lender before instructions are sent to the lawyer to release funds. The cost of appraisal is the responsibility of the borrower.
Here is an example of a Purchase Plus Improvement mortgage. The house is priced at $300,000 but it needs another $20,000 in renovations. You can add in the renovations cost to the purchase price and CMHC or Genworth will lend against the total value (purchase price plus the renovation cost).
Purchase price $300,000
Renovations $20,000
Total cost $320,000
Lending value $320,000
Max. Mortgage $304,000 (95% of $320,000)
Min. down payment $ 16,000
Please don’t hesitate to contact me if you have any questions or require additional information.

Chita Rattanarasy
Mortgage Associate
TMG The Mortgage Group Alberta LTD
780-932-2225

12 Doable DIY Projects for Your Outdoor Space

Thursday, April 18th, 2013

Prettify your porch or patio with these time-sensitive decorating boosts you can do yourself

With advance planning and perhaps a few friends to help (bribe them with dinner out), you can make a big difference in your patio in a single weekend. Arranged from fast and easy (hang lanterns, make a repurposed table) to more time- and labor-intensive (create a canopy, paint the floor) projects, these DIYs are sure to offer something to suit your time commitment and style

1. Make a quick table. Cluster a trio of ceramic garden stools together and top them with a glass tabletop for a nearly instant outdoor coffee table.

2. Warm up a look with candles and solar lights. Enhance the ambience at night by setting out lanterns filled with votive or battery-operated candles, solar garden lights and string lights. Try surrounding your seating area with lights, light up the pathway or place lights in the landscaping along a fence line.

3. Enhance your seating area with a backrest. Use a small curtain rod with decorative finials to re-create the look of this eclectic patio seating area. Just be sure to measure the hanging height of your rod with someone seated there — you don’t want it so low that it will be bumped into. Finish by sewing fabric ties to a rectangular cushion and hang it from the rod.

4. Try a wall planter. Jazz up a big, empty wall with a wall-mounted garden. Use store-bought planters designed for this purpose or fashion your own using found materials.

5. Add style and privacy with outdoor curtains. Outdoor curtains can be pulled closed to block unsavory views, provide privacy from close neighbors and shade you from the sun — and even when open, they add to the ambience.

If you have any sort of framework or roof on your patio, you can attach curtain rods. Be sure to choose hardware and curtains meant for outdoor use for the most durability.

6. Repaint outdoor furniture. Give your old patio furniture a lift with a bright new coat of paint. Even metal furniture can be repainted — look for a paint designed for use on metal, such as Rust-Oleum.

Don’t feel like doing it yourself? Have your metal patio set powder coated at an auto paint shop instead.

7. Create a chic new floor with gravel. If the only space you have to work with has a floor made of cracked concrete or unsightly asphalt, consider covering it up with a few inches of compacted, crushed gravel.

8. Build a unique planter from cinder blocks. Architectural photographer Zack Benson came up with the innovative idea of using stacked and glued cinder blocks to create a cheap and easy DIY succulent planter. You can find more information about this project on his blog.

9. Filter the light. Unfurl rolls of bamboo trellising over a pergola or similar structure (free of plants) to form a roof that will protect you from the sun. If you can climb a ladder and wield a hammer, this should be a pretty doable weekend project. Attach the bamboo using a heavy-duty staple gun or by hammering in U-shaped nails.

10. String up a canopy. Whip up a lovely, albeit temporary, outdoor roof by tying lengths of lightweight fabric to bamboo stakes, fence posts or even a nearby tree.

11. Paint the ceiling or floor. If you have a covered patio, paint the ceiling for a major lift. Pale blue and sunshine yellow are great foolproof options.

If you have a cement or wood floor on your patio, consider giving it a new look with a few coats of porch and floor paint.

12. Get crafty with stripes or stencils. Take your floor paint job to the next level by painting wide stripes or layering stenciled designs over a solid base color.

Turn Your Carport Into an Outdoor Dining Room


Source: Houzz.com

The data included on this website is deemed to be reliable, but is not guaranteed to be accurate by the REALTORS® Association of Edmonton. The trademarks REALTOR®, REALTORS® and the REALTOR® logo are controlled by The Canadian Real Estate Association (CREA) and identify real estate professionals who are members of CREA. Used under license.