Archive for the ‘Do-It-Yourself’ Category

Pet-Proofing Your Home: A Room-by-Room Guide

Sunday, March 9th, 2014

Everyone who gets a dog or cat soon learns that a certain amount of vigilance goes with pet ownership. Puppies and kittens especially can get into everything and escape through the tiniest opening. Some of the better-known dangers are toxic plants and food. But do you know about the other dangers that might lurk in your home and garden? From the bathroom and laundry room to the office, kitchen, garage and even the great outdoors, there are some expected and unexpected hazards your pet might face.
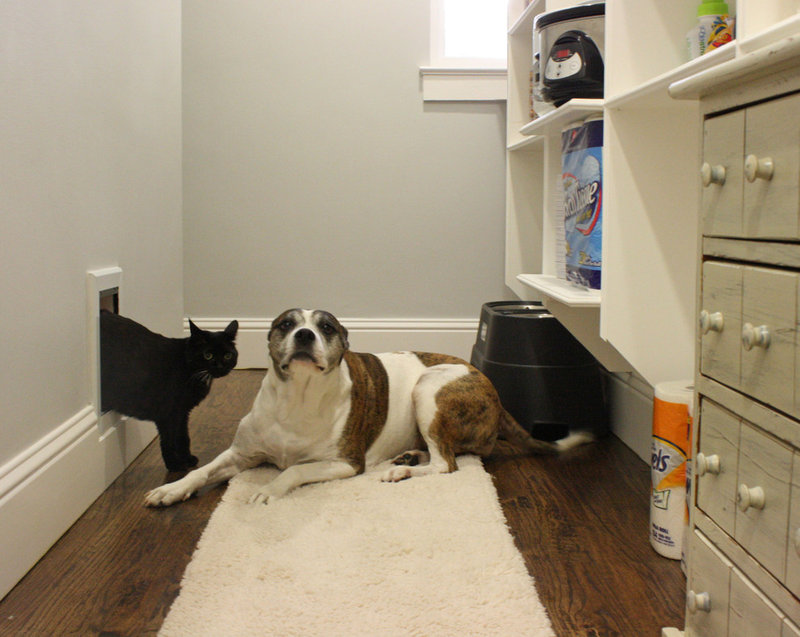
transitional  by Kara Weik
There is good news. First, a lot of these potential dangers are things your pet will probably ignore. More good news: You can easily take care of most of these potential problems. Some of the rules are simply common sense: Keep small objects and items that can be easily eaten or swallowed out of their way. As for other dangers, just look around from your pet’s point of view and see what might be tempting and troublesome. Consider pet-proofing your home to be much like baby-proofing; you’re simply making sure that pets and possible problems don’t mix.

Also remember, while dogs may seem to be more trouble-prone than cats, cats can get into far more — and higher — spaces in your home.

There’s even a bonus to these precautions: a tidier house. Storing things safely away after using them also turns out to be much easier than coaxing them away from a pet determined to destroy them, or even worse, making an emergency trip to the vet. And it will leave you with much more room for you and your pet to play with the things that are safe.

contemporary kitchen by Chang + Sylligardos Architects
Kitchens. Food is, of course, the most common kitchen-related problem. The best-known problem food is probably chocolate, but other possibly toxic foods include avocados, grapes and raisins, macadamia nuts, onions, garlic and coffee. Other things to watch out for are sharp knives and little things like twist ties that can easily be swallowed.
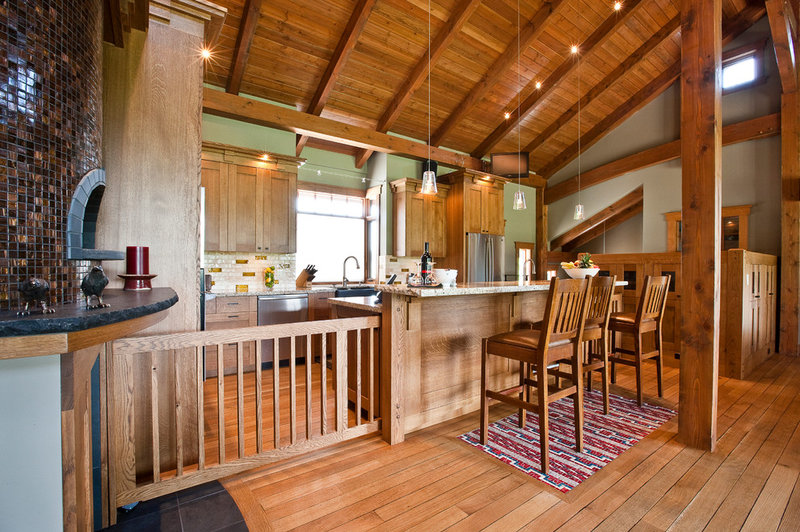
craftsman kitchen by River City Woodworks
You may want to install a door or gate to keep animals out of the kitchen while you’re cooking. If it looks as nice as this, it’s a bonus.
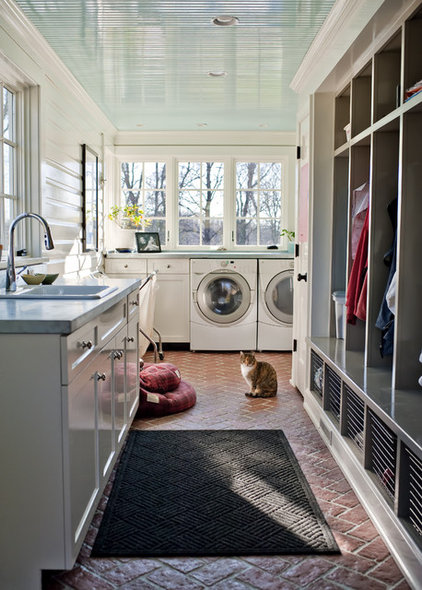
traditional laundry room by Rock Paper Hammer
Bathrooms and laundry rooms. Some hazards are obvious: cleansers, detergents, fabric softeners, bleach, medications, vitamins and even dental floss can all be dangerous if eaten or swallowed.

Dogs in particular may be tempted to chew on, and potentially swallow, towels and stray socks (and you were blaming the dryer for eating them), which can lead to severe gastrointestinal problems.

traditional bathroom by INVIEW Interior Design
There are some other dangers in the bathroom and laundry area that you might overlook. In addition to the “yuck” factor, drinking out of the toilet isn’t good for pets, especially if you use chemical cleansers. Sinks and tubs filled with water and left unattended can pose a drowning hazard for small pets.

Washers and dryers can be a tempting spot for a nap, especially for cats, and you may not notice them if you put in a load of clothes. Keep the doors on appliances closed.

craftsman home office by Brooke B. Sammons
Gathering areas. There generally aren’t too many dangers lurking in these rooms, but there are a few possible trouble spots. The fireplace is a big one; pets can be harmed by flames and flying ashes. A simple screen is probably all you need.

Another overlooked danger is fire-starter sticks. They’re somewhat sweet, and some dogs can’t resist eating them.

traditional home office by Mike Smith / Artistic Kitchens
Wires and cords can also be a problem; chewing on a plugged-in cord can electrocute a pet. Tucking cords away or covering them will keep them out of your pet’s way and also will leave your room looking neater.

As a general precaution, put anything you value or anything that’s a chewing or choking hazard (puzzle pieces, small toys and so on) out of reach when you’re not around.

traditional entry by Wendi Young Design
Open doors and windows are great for letting in fresh air, but not great if they tempt your animal out into a world of cars and other dangers.

Be sure that if pets can get out, they’ll be heading into a safe place, such as a fenced yard. Otherwise, screens are a great compromise. You can even find ones that are almost invisible.

transitional bedroom by VisuaLingual
Bedrooms. Aside from the danger of a puppy’s chewing on your good shoes, bedrooms are generally fairly benign when it comes to pet danger. But to be on the safe side, keep jewelry, hair clips, pins and bands away from exploring pets.

One potential serious hazard, though, is mothballs. They’re toxic, so if you use them, be sure they’re in a place your pet absolutely can’t reach.
eclectic  by SFGIRLBYBAY
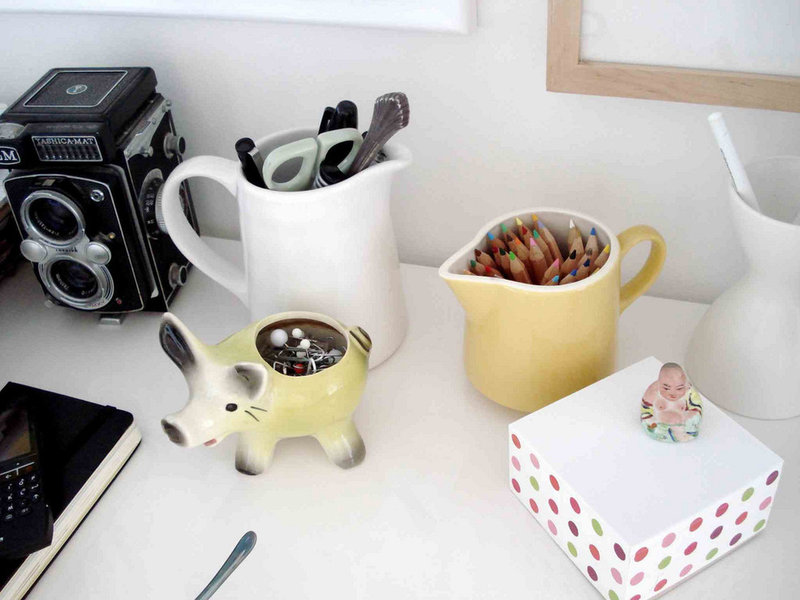
Areas with odds and ends. Everyday objects such as batteries, buttons, coins, paper clips and rubber bands can all cause problems if chewed or swallowed. If you’re into crafts, be sure sharp objects, including needles, are out of reach. Plastic bags and plastic wrap can cause suffocation.
eclectic garage and shed by The Cavender Diary
Garages and basements. These are storage areas for lots of things, including things that can be a problem if your pets get into them. The simple solution is to keep things like pesticides, gasoline, solvents, antifreeze, coolants and oils either high up or in a closed cabinet. The same is true for small things, like screws, nuts, bolts and nails.

If you live in a snowy climate, be aware that de-icing compounds may also contain dangerous chemicals, so look for ones that are safe for pets.
farmhouse landscape by Jessica Helgerson Interior Design
traditional landscape by gail olsen
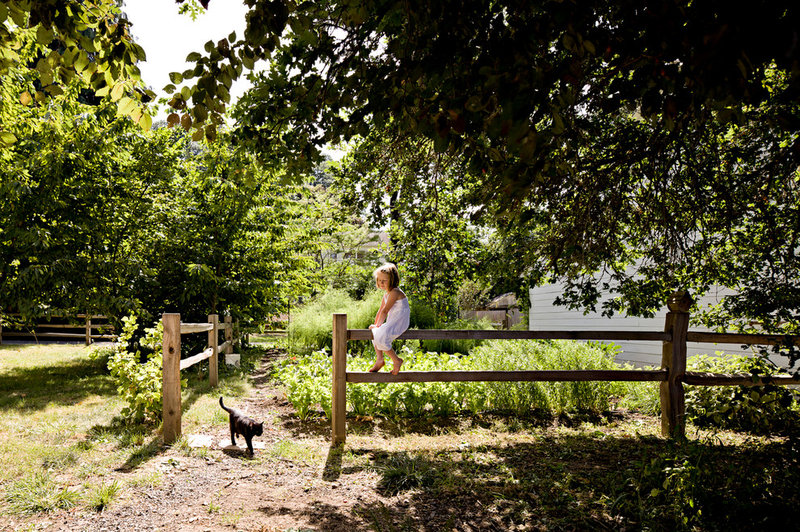
The great outdoors. Just as food in the kitchen can be a problem for pets, so can plants in the garden. There are any number of plants that can cause problems; for some of the most common ones, see the Houzz guide, 22 Plants to Keep Away From Pets.

Compost, cocoa-based mulches, pesticides, insecticides, fertilizers and other garden chemicals can all cause problems for pets. Your first line of defense is keeping things stored away safely and out of reach.

traditional landscape by Between Naps on the Porch
Between Naps on the Porch
Traditional snail and slug bait is also toxic. If you need to keep your vegetables and other plants safe from these mauraders, look for barrier methods or pet-friendly bait formulations.
traditional patio by Gleicher Design - Architecture & Interiors
Gleicher Design – Architecture & Interiors
Balconies may seem safe, but it’s easy for small pets to slip through the railings or get stuck halfway.
traditional  by Between Naps on the Porch
Between Naps on the Porch
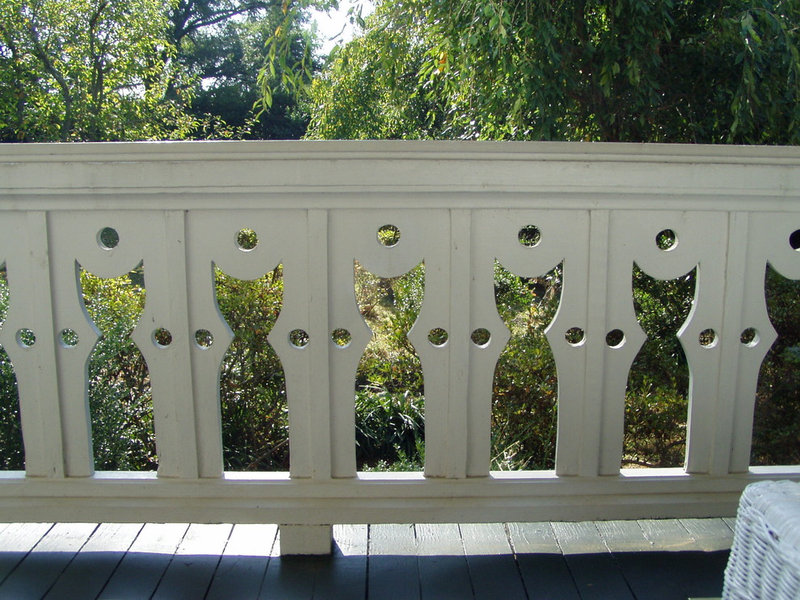
Of course, it also would be hard to resist this railing, even if your cat could get over or around it.
contemporary porch by Green Roots Landscaping Inc
Be sure latticework is in good repair as well, so pets won’t get stuck or crawl into spaces where they shouldn’t go.
traditional porch by Soorikian Architecture
Just as fireplaces can be a danger indoors, ashes and flames from fire pits and barbecues can be hazardous. Keep an eye on both the fire and your pets, and if you’re barbecuing, keep the lighter fluid out of reach.
contemporary pool by Bonick Landscaping
Chemicals are an obvious source of trouble if pets drink from pools and spas, but there are other dangers as well. Even if pets can swim, they can still drown in pools and spas if they can’t get out. Long, low steps may help, but your best approach is to keep pets away from the water, either with covers or fencing or by keeping them inside unless accompanied.
traditional landscape by Deck and Patio Company "Outdoor Living Experts"
As with pools and spas, ponds might pose a problem if a pet falls in and can’t get out. A sloping side to a pond will provide better footing and give your pond a more natural look.

Ponds are also prone to forming algae, which may be toxic by itself or because of the chemicals added to destroy it.

Source: Houzz.com

Get More Island Legroom With a Smart Table Base

Monday, February 17th, 2014

Seating for a kitchen island is a popular design feature that lets your counter space do double duty. While an overhang on the back of the island supported by cabinets is the most common arrangement, it doesn’t afford the best legroom. Who hasn’t banged their knees while scooting onto a kitchen island stool? Islands designed with an integrated dining table at one end fare a little better, but you still must have the right table base for maximum leg comfort. Here’s what to consider.

modern kitchen by Drawing Dept
This simple metal base adds another modern element to the room. The open design, with a base that’s set back from the sides and ends, creates a lot of legroom and is visually lightweight to match the thin profile of the countertop. Another diner could probably be placed on the end.

Allow 24 inches for each chair width and a minimum table width of 30 inches for comfortable seating.

contemporary kitchen by Impala Kitchens and Bathrooms - Petra Mallia
Here’s another base that’s set back from the end and the sides. This arrangement provides legroom for diners sitting across from each other, as well as for a diner or two on the end. The slab design of the base here matches the heft of the countertop better than an open, lightweight design would have.
contemporary kitchen by Nest Architectural Design, Inc.
A square kitchen with a symmetrical contemporary look demands the same in an island. Here that island was designed as a table, without any cabinets. The heavy corner legs give the island visual weight and definition, but they also mean diners won’t bump knees. This dining island is probably at least 60 inches per side, an arrangement that allows two diners per side.
modern kitchen by Art of Kitchens Pty Ltd
Look closely and you can see that this wood countertop is supported by a mirrored base. The size and construction of any base depends on the size and weight of the countertop. Mirroring a base makes it virtually disappear.
traditional kitchen by Warmington & North
This traditional kitchen has a round, bar-height dining table with a furniture-style pedestal base. You can find a pedestal base in any style. A pedestal allows diners to easily gather around the table without bumping into the base or one another.
contemporary kitchen by Furniture by Dovetail
The base of this dining table matches the cabinetry, but the prow shape makes it lighter than a boxy cabinet would have looked. Because the base follows the curve of the countertop, knee space is retained for each diner, making the entire length of the countertop usable. This is also a good way to visually lighten the size of a big table area.
contemporary kitchen by MINOSA
When you are planning your kitchen, remember that a very heavy surface material, such as the marble shown here, will require heavy support underneath. Be sure to calculate the width of the base into the total width of the tabletop. Too wide? Reconsider the material and the base design.
contemporary dining room by Ugljesa Kekovic
A waterfall design creates a beautiful and simple support for the top here. Make sure you have as much length as you need for chairs on each side with something like this, since the flush end is not usable for seating.
contemporary kitchen by Platinum Building Group
The beautiful custom wood base of this island serves as a sculptural element as well as a functional support. The slender V-shape base provides good countertop support but also allows for plentiful knee space.
contemporary kitchen by Taylor Smyth Architects

When is a table base not a table base? When the piece is cantilevered. This dining area can welcome a big crew, as well as Fido comfortably sprawled under the table.

Source: Houzz.com

Edmonton House Repairs And Upgrades: How Much Will They Cost?

Sunday, February 9th, 2014

home-repair-handyman-home-hero

During the process of buying or selling a home, your clients often learn about recommended or required repairs and upgrades. This can happen as a result of the home inspection as well as your expert knowledge of your market and comparable homes. Of course, the first thing homeowners want to know is, “How much will that cost?”

Pillar to Post is pleased to offer our Residential Construction and Remodeling Estimates cost guide, which provides estimated cost ranges for repair and/or replacement of the major systems and components in a home. It also includes general guidelines for the life expectancies of those systems. This information can help your clients make informed decisions when they’re considering home repairs or improvements, and is especially valued by homeowners before their property is listed. Below is just a sampling of our list of estimated costs for hundreds of repairs/upgrades.


Floors
Hardwood Floor Refinish $2-$5 / sq. ft
Carpet-clean $100 / room
Ceramic Tile $5-$10 / sq. ft

Kitchen
Renovation $7,500 +
Counter-laminate $40 / lin. ft
Kitchen counter-marble $75 / lin. ft

Security System
Alarm System $2,500
Alarm Monitoring $30 / month

Deck
Pressure Treated $15-$25 /sq. ft
Custom Designed & Built $50-$75 / sq. ft.

Windows
Skylight $750 and up
Thermal Glass (existing frame) $30 / sq. ft.


These estimates reflect the average basic costs for supplies and installation of building materials in United States and Canada. Costs may vary depending on regions, upgrades, complexity, and disposal fees.

Source: Pillar to Post Newsletter

Watch for these electrical hazards in your home

Friday, February 7th, 2014

·ºÅØ

Electricity in the home is so commonplace that it’s easy to forget how dangerous it can be. According to the American Institute for Preventive Medicine, an electrical shock can knock you unconscious, cause a serious burn, or even stop your heartbeat.

Fortunately, there are some simple things you can do to reduce the risk.

  • Install safety plugs in outlets that young children can reach.
  • Never plug in anything with a frayed or otherwise damaged power cord.
  • Never use a plugged-in computer, hair dryer, or other electrically-powered item near a filled sink or bathtub. This includes phones with power cords.
  • Never touch anything electrical with wet hands or while standing in water. (Water is a remarkably efficient conductor of electricity.)
  • Always turn off the appropriate breaker before doing any electrical work, such as installing a new light fixture.
  • When replacing a broken light bulb, turn off the breaker first. Although the glass is broken, the filament may still be conducting electricity.

Finally, unless you’re an expert or an electrician, never do any major electrical work on your own. Hire a professional.

11 Ways to Update Your Kitchen Without a Sledgehammer

Monday, February 3rd, 2014

Screen Shot 2014-02-03 at 12.43.28 AM

OK, so you have a perfectly good kitchen. The layout works; the cabinetry is solid; but it just needs a little uplift. There are plenty of relatively minor changes you can make that don’t involve restructuring your life and house. Here are a few.

1. Repaint your cabinets. A fresh coat of paint can transform a kitchen from dark and dingy to light and airy. If you are a few years away from that big kitchen reno, this is a great time to have some fun with color.

2. Upgrade your countertop. Upgrading a dated countertop will give new life to your entire kitchen and add value.

3. Install a new backsplash. If your cabinetry and countertop work nicely but your room lacks pizzazz, a new backsplash can add lots of personality and really dress up a kitchen. A bit of texture, sparkle or gloss will give simple cabinetry a lot of presence.

4. Make a statement. New jewelry always picks up my mood. It can do wonders for your kitchen too. New hardware can dress up plain cabinets, while standout lighting fixtures can add a surprising wow factor.

5. Change your faucet. A detachable hose with a hand spray comes in handy for so much more than just giving a bath to the cat. I prefer a faucet with a flexible braided water-supply hose. It looks better than a plain black rubber hose and will last longer.

6. Expand your horizons. Need more surface area? Don’t think you need to start from scratch. If you have an island, you can introduce a different material on an added eating counter either below or above the counter.

The standard counter height is 36 inches. A nice option, like you see here, is to add an extension at table height (30 inches is typical). The great thing about adding a table-height extension is that regular kitchen and dining chairs will pull up to the counter comfortably. If you prefer a higher surface, you could go with bar height (40 to 42 inches).

7. Consider refacing. New cabinet fronts and doors can dress up the cabinetry boxes if the layout already works and they are solid.

8. Rethink the uppers. Open shelving offers an opportunity to display collections or just keep frequently used items accessible. Wine comes to mind, but that’s just me.

9. Add some cozy touches. A runner is a great addition to a galley kitchen. I don’t know why we are disciplined to treat our kitchen like it has a different set of rules when it comes to decor. I’m all for adding a table lamp for an unexpected element in a kitchen.

10. Add a floating island. If a new bank of cabinetry is beyond the budget, try a ready-made freestanding piece to add extra storage and a surface for working and eating surface.

Add a new top to a freestanding piece of furniture and extend the edge for an eating counter. The minimum overhang would be 10 to 12 inches, but there are a few considerations when extending the top. Take care not to shift the balance of weight so much that the piece is unstable (people love to rest their elbows, adding weight to the surface). Also you may need to add brackets to support the overhang.

11. Add a showstopper. A simple kitchen with simple cabinetry is downplayed by a showpiece range. Playing up one feature is a great way to detract from less interesting elements.

Source: Houzz.com

How to Create a Built-In Home Bar

Monday, January 6th, 2014

Screen Shot 2014-01-06 at 10.24.52 AM

You may have just finished draining your champagne glass on New Year’s Eve, but it’s not too soon to resolve to make your next home gathering more stylish, more sophisticated and easier by adding a home bar in 2014. Here’s what to know if you’d like to get it done.

Save Photo

Project: Building a home bar into a nook or wall.

Why: “Home bars create a special place to store and serve drinks closer to the living space,” says New York architect James Wagman. “If the bar is near the action, the host can create wonderful drinks while socializing with guests and family.”

Built-in bars don’t need to be limited to homes blessed with abundant square footage. A built-in bar can be the width of a single cabinet. Wagman installed this diminutive but mighty bar at the entrance to an apartment’s living room. Pocket doors come out of the wall to hide the unit when it’s not in use.

Who to hire: More bells and whistles require more pros. A well-stocked bar, such as this crisp blue entertaining space by South Park Design Build in Toronto, would require an architect or interior designer to design the space and a contractor to build it. The building crew might include a carpenter to construct custom cabinetry, a plumber for a sink and an ice maker, an electrician to add outlets for a refrigerator and other appliances, a tile setter to install a backsplash and a painter to provide the finishing touches after the hammering is done.
Project length: Most professionals interviewed for this article — including the creator of this bar, San Francisco interior designer Tineke Triggs of Artistic Designs for Living — say you should allow a little more than a month to add a built-in bar. However, David Miller of David Michael Miller and Associates in Scottsdale, Arizona, cautions that the more customized the project is, the longer it will take. “There’s a wide range,” he says, “but if you are building it from scratch, it may take six to eight months due to custom millwork.”

Cost: As with every home improvement project, the cost will depend on the scope of your project, your choice of materials and finishes, and the price of labor where you live. Luly Melarti, a designer and architect at TerraCotta Properties in Decatur, Georgia, estimates that adding a bar similar to this one she did for entertaining-loving clients could cost around $9,200 — and that’s if there’s an existing niche where it could be placed and walls don’t need to be moved. She breaks it down this way:

    • Design fees and labor: $4,000
    • Cabinets: $3,000
    • Refrigerator: $1,200
    • Countertop: $600
    • Mirror backsplash: $400

“Obviously, there’s a wide range in costs, depending on how much work needs to be done,” she says. “If you don’t move walls and you don’t add plumbing, you are going to save money.”

Melarti notes that this client opted for no sink and installed a tough Corian countertop. “If you choose a more expensive stone, you will need to babysit it. With this material you don’t need to worry about etching from wine, lemons or limes,” she says.

San Francisco interior designer Anastasia Faiella created this bar for coffee and stronger drinks with her architect husband Andre Rothblatt, and says a similar feature could cost between $13,000 and $15,000, not including design fees. “This example is a very high-end, customized project, and the homeowner wanted things to be extra special,” she says. “The design included a wine refrigerator and an espresso maker that needed plumbing.” She estimates costs this way:

  • Custom cabinets (materials, labor, installation): $5,000
  • Labor for appliance installation: $3,000
  • Miele coffee system: $2,999
  • ULine Echelon series wine refrigerator: $2,899
  • Countertop (wood with a decorative finish): $1,000

Permit needed: If you are adding plumbing or electricity or moving walls, you will need a permit.

Best time of year to do it: Eric Adelman of South Park Design Build says building a bar is a seasonless project. “Anytime is the right time for this project,” he says. “Especially if you are thirsty!”

Architect Nico van der Meulen in Randburg, South Africa, says if you are staging a major remodel or building a new home, plan for a bar early in the process. “Begin right at the start of the planning and building to ensure there is ample space for it,” he says.

First step: Miller suggests doing your homework. “To start the brainstorming process, look at sites like Houzz or design magazines to see what other people, designers and architects are doing,” he says.

Jason Urrutia of Urrutia Design in Sausalito, California, suggests starting small with a bar cart or tray. “You can move it around and see where it works best before investing thousands of dollars,” he says.

Once you’ve decided to make it more permanent, “if you want a professional look, hire a professional,” Miller advises.


Source: Houzz.com

Keep Your Refrigerator/Freezer In Good Working Order

Friday, January 3rd, 2014

fullfridge_440x300

The latest refrigerator/freezers are great at saving energy and offering convenience, but many new features require sophisticated programming and circuitry that simply isn’t built to last as long as the energy hogs of previous generations. To help you extend serviceability over time, be mindful of a few small maintenance recommendations.

Two of the most important ways to keep your fridge/freezer running efficiently is to ensure all door seals are intact, and to keep the condenser coils free of dust, debris and clutter. The fragile coils are usually situated above, below or behind the unit, often protected by a screen or grill, to provide undisrupted access to cooler air. They should be carefully (gently) dusted at least once a year. The third maintenance step is to

make sure any water or ice dispensers are clear and free-flowing.

Your Next Big Project: Seven Steps To Help You Prepare For A Major Renovation

Thursday, January 2nd, 2014

Screen Shot 2014-01-02 at 1.02.37 PM

1)  Identify the changes or additions you need for function, then add a wish list inspired by magazine articles or web resources. Don’t factor in cost at this stage.

2)  Consider how your project might affect other parts of the home (e.g. energy-efficient windows won’t be very effective if adjoining rooms are leaking air).

3)  Before planning changes in structure (e.g. walls) or utility locations (e.g. HVAC, plumbing and/or electrical), engage the advice of a trusted professional.

4)  Interview prospective contractors and their references. Choose the one most suitable, based on ideas, itemized costing, communication skills, realistic timelines, relevant experience and references.

5) Define a clear, realistic and affordable budget, leaving about ten per cent for contingencies.

6) Insist on liability insurance, licensed trade work, industry standards and inspections, material warranties and guarantees (as applicable), as well as a contract with reasonable timelines for consultation, design, permits, material acquisition and completion deadlines – with applicable penalties if breached unreasonably.

7) Be flexible, but avoid changing plans mid-project, if possible.

10 Bold Ideas for Modern House Numbers

Sunday, December 8th, 2013

Screen Shot 2013-12-08 at 9.03.31 PM

Plain house numbers not cutting it? There’s no reason to settle when there are so many inventive options out there. From unique techniques and materials (like lit-from-within neon, laser-cut steel and customized concrete) to clever placement (on hanging pub signs, on the garage), these 10 examples from around Houzz are packed with creativity. See if one sparks a new idea for your own house.

1. Statement sign. Not for the faint of heart, to be sure, but on the right house (which would probably be a modern one), a large address sign like this one can look stunning. No one will have any trouble finding your house with this in the front yard.

2. On the garage. If your garage is the first thing visitors see, take advantage of it. Position bold house numbers or a custom address sign like this one right on your garage. The designers who crafted this address used marine-grade wood, which can withstand the elements.

3. Laser-cut door. Cool and industrial without being over-the-top, this home’s address was laser cut into a rusted steel door. Perfect for an urban residence. (Just be sure emergency personnel can see it.)

4. Neon glow. Surprisingly subtle from a distance, these house numbers reveal themselves to be crafted from neon tubes up close. With numbers lit from within, evening visitors will have no trouble finding their way to your door.

5. Hanging post. Like a modern twist on a Ye Olde Pub sign, this would make a nice complement to standard house numbers on the front of a modern home. With a bright background and positioned on the side of the house, a hanging address sign like this would be easy to spot even from down the street.

6. Set in concrete. Having some concrete work done around your home’s exterior? Consider having your house numbers set right in. The size of these house numbers is ample, but because they are set into the concrete, the look overall is subtle.

7. Supersized. If you have a single or double-digit address, smaller house numbers can get lost on the facade. Make short addresses stand out by going with extra-large (8-inch-plus) house numbers. Choose high contrast for the best visibility, such as dark numbers on a light facade.

8. Etched glass. Have a beautiful but plain glass door? Customize it with etched house numbers. Framing the numbers in a circle, as shown here, is a great way to make the numbers stand out even more.

9. Quirky and painted. If you want something totally different, hire an artist to paint your numbers directly onto a feature in front of your house or on the porch. Here the house numbers were painted onto a rainwater cistern, but you could choose to have them painted on a fence, sculpture or sign.

10. Double address for a corner lot. When visitors can approach from either side, why choose only one to place your house numbers on? Build in a landscape feature, like the one shown here, and you can display your address on both sides.


Source: Houzz.com

15 Ways to Warm Up Your Bathroom for Edmonton Winter

Thursday, December 5th, 2013

Screen Shot 2013-12-05 at 6.47.05 PM

Oh, that dread — you wake up in the middle of the night to take a trip to the bathroom, but you know that cold tile will chill all the toastiness right out of your feet. Or you come in from a chilly football game longing to take a luxurious soak in the tub, but the thought of shedding your layers of fleece stops you in your tracks. Soon it will be that time of year when you want your bathroom to raise your body temperature. Here are 15 suggestions that range from something you can do in minutes for a few bucks to dream-space renovation ideas.

Add a cozy rug. A bath mat does not have to be a shaggy little rectangle. Add an Oriental rug to enjoy underfoot during fall and winter. The rich colors will warm up the look of the room as well.
Be sure to add a rug pad or rug tape that will grip the floor underneath any bathroom rug to prevent slips.

Blend beautiful natural materials. Soapstone sinks atop wood countertops add so much warmth to this bathroom. The look reminds me of the natural beauty of a rock outcropping in the woods.

Take a different approach to lighting. We tend to think there is a certain type of characterless light we need to choose for bathrooms, like those flush-mount “boob lights.” This is not true; open your mind and browse the type of lighting you would usually associate with a foyer or dining room.

If you are installing a hanging chandelier or pendant light in a bathroom, work with a licensed electrician who knows the codes inside and out. A chandelier cannot be within reach of someone standing in a bathtub full of water; the fixtures will also need to be properly grounded, and you’ll need a high ceiling.

Consider heated floors. One of the most luxurious things you can do to make your bathroom toasty in chilly weather is invest in radiant-heat flooring. If you are planning any renovations, learn more about what this entails and what the payoffs are.

If you don’t have room in the budget for such a large investment, talk to your electrician about installing a bathroom-safe heater you can turn on before your bath or shower. Again, I stress, working with licensed pros is a must; you don’t want to scrimp on safety with electronics in the bathroom.

Get your towels toasty. Heated towel bars add luxury to the bath, giving you a wonderful way to wrap up when you step out of a steamy shower.

Rev up the wall color. So many of today’s most beautiful bathrooms are crisp and white, but that’s certainly not a requirement. Whether working with wall coverings, paint or tile, think outside the usual bathroom color palettes if the thought of white marble leaves you cold.

Incorporate antiques. The well-worn patina of this table-turned-vanity and the eclectic miners’ oil lanterns add warmth and personality to a white bathroom. There are even votive candles in the lanterns for cozy light that creates a relaxing ambience.

Invest in a bathtub that helps retain heat. Materials like copper, brass, volcanic limestone and soapstone retain heat and will help to keep that hot bathwater warm while you enjoy the entire new issue of People.

Am I the only one who gets a People in the mail and thinks, “Sweet! It’s People and bath time for me tonight”?Just wondering.

Install a steam shower. This is a big-ticket dream-space item, but everyone I know who has one seems to think they can no longer live without it. I did get a chance to test one out at a vacation rental once, and I can report that it was heavenly.
Consider a home sauna. Historically much more common in countries like Sweden, saunas are becoming more popular in the States.
Think steampunk. Winter brings dark, moody days. Instead of fighting the moodiness, this designer celebrated it, stunning us with copper pipes and that old-fashioned high toilet tank. (Remember how awesome you thought those were at TGI Fridays in the ’80s?)
Let in the light. Windows, skylights and a clear glass shower surround make the most of natural light. If your concern is privacy, explore using transoms, acid-etched glass and clerestory windows.
Get woodsy. In a ski house, cabin or lake house, it’s part of the experience to go full-on woodsy in the bathroom. If you love the look, go ahead and do it at home, but do think about whether or not you’ll tire of it, especially during the summer.
If you want to go “woodsy light” instead, give the forest a nod instead of a bear hug. Knotty pine walls are not a requirement — you can get your woodsy on with beautiful fabrics that show trees and branches, plus a wood-framed mirror and other small accessories.
Add a sunny shower curtain. Yellow will perk up a dark winter’s evening.

Add a fireplace. This is one of the most luxurious bathroom features I can imagine. The first time I ever saw one or heard of it was in a house that had belonged to a Harlem Globetrotter. (And now I’m doing their whistle …)

In fact, if I win the lottery, this is the first bathroom design move I’m going to make.

Source: Houzz.com

The data included on this website is deemed to be reliable, but is not guaranteed to be accurate by the REALTORS® Association of Edmonton. The trademarks REALTOR®, REALTORS® and the REALTOR® logo are controlled by The Canadian Real Estate Association (CREA) and identify real estate professionals who are members of CREA. Used under license.